Category Archives: Recipe

Seviya kheer (vermicelli kheer)

Yesterday AS felt like having Seviya kheer out of the blue so I decided to make one. Seviya is fried vermicelli noodles. I bought a packet of fried Seviya from an Asian grocery store. This was the first time I tried it and I have to admit, it was very easy.

Seviya kheer  (2)

Seviya kheer  (3)

Ingredients

  • 200gm vermicelli
  • 800 ml milk
  • 3 tablespoons sugar (add more or less according to your taste)
  • 2 tablespoons ghee/clarified butter
  • 7-8 roasted or fried unsalted almonds, chopped

Instructions

  • Heat ghee in a pan and when it is melted add vermicelli and fry till they become golden brown.

Seviya kheer  (4)

  • Pour the milk and let it come to a boil.

Seviya kheer  (5)

  • Add sugar and mix well.
  • Lower the flame and let the milk simmer for 5-7 minutes till the vermicelli gets cooked.

Seviya kheer  (1)

  • Add chopped almonds.
  • Serve the kheer hot, warm or cold.

Seviya kheer

  • I prefer mine cold :). Enjoy!

Sautéed Brussels sprouts with Bacon & Onions

I know many people don’t like Brussels sprouts but every time I read any healthy recipes, it seems to be on the menu so I decided to find a good way to eat it. I know if Brussels sprouts is not done right, it won’t taste good but sautéing with bacon and onion seemed to do the trick. Even AS was happy to eat it and told me he didn’t mind eating it again.

So here is a simple way to enjoy Brussels sprouts.

Ingredients

  • 200 gm Brussels sprouts cleaned and trimmed
  • 4 slices bacon, cut into 1-inch pieces
  • 1 tablespoon olive oil
  • 1 large onion, diced
  • 1 teaspoon salt
  • Freshly ground pepper  to taste
  • 2 teaspoons lemon juice (optional)

Steps

  • Cut the cleaned and trimmed Brussels sprouts into halves. Make sure the sprouts are similar in size so some don’t overcook and some under cook.

Sautéed Brussels sprouts  (8)

  • Boil water in a big pot and when it starts boiling add the sprouts.

Sautéed Brussels sprouts  (1)

  • Boil the sprouts for around 3-5 minutes making sure it is tender and not over cooked.
  • Drain the sprouts

Sautéed Brussels sprouts  (2)

  • In a pan, cook bacon over medium heat until it is crisp. And put aside.

Sautéed Brussels sprouts  (3)

  • Now cook the chopped onion in the pan and cook until golden brown.

Sautéed Brussels sprouts  (4)

  • Increase heat to medium-high, add the Brussels sprouts, and cook stirring occasionally, until tender and warmed through. It should be around 3 minutes.

Sautéed Brussels sprouts  (5)

  • Add the bacon and lemon juice(optional).
  • Season with salt and pepper or chilli.

Sautéed Brussels sprouts  (6)

  • Rest it for a while and it is ready to be served.

Sautéed Brussels sprouts  (7)

  • We had ours with grilled lamb.

You may also like :

*Stuffed capsicum with minced chicken and brown rice

*Jamie’s Crackin’ Crab Briks, Couscous Salad & Salsa

*Blueberry muffins

Khandeko mula ko achar (Pickled radish)

Here is another pickle recipe I learned in Nepal.

Ingredients

  •     1 litre glass jar
  •     1/2 kg white radish cut into inch
  •     Garlic 50 gms chopped
  •     Ginger 20 gms chopped
  •     3 Green chilli chopped
  •     1.5 teaspoons Cumin powder
  •     1.5 teaspoons Coriander powder
  •     1.5 teaspoons Red chilli powder
  •     1.5 teaspoons Turmeric powder
  •     2 teaspoons Mustard seed powder
  •     2 teaspoons Salt
  •     2 teaspoons Mustard oil

I used a glass jar which came with 1kg honey estimating it’ll hold around 1 litre of water. The idea is to fill it with the ingredients with a bit of space to spare. The radish should fill about 80% of the jar and the ginger and garlic 10% with 10% empty. Chilli is to taste.

mula ko achar (1)

Process:

  • Cut the radish into 1/2 inch block and chop Garlic, Ginger and Green chillies and put them in a large bowl.

mula ko achar (2)

  • Add the spices as mentioned in the ingredients and mix them all together.

mula ko achar (3)

  • Fill the glass jar to around 90%.

mula ko achar (4)

  • Put a clean wrap or plastic bag on the month of the jar and close it tightly so no air can enter.

mula ko achar (5)

  • Leave the jar where it can get direct sunlight.
  • Every few days, open the jar and move the tomatoes around. Close the jar, tightly.

mula ko achar (6)

  • The pickle will be ready in 4-5 days. Enjoy!

You may also like :

*Khandeko golbenda ko achar *Aloo ko achar  *Aloo dum 


Stuffed capsicum with minced chicken and brown rice

All the cooking shows on TV inspired me to cook something new the other night. It was stuffed capsicum and it turned out so yummy. Here’s the recipe.

 Ingredients

  • 4 large yellow capsicums (I used 2 yellow and 2 green ones but yellow was yummier)

Stuffed capsicum (1)

  • 2 tablespoons olive oil
  • 1 onion, finely chopped
  • 350 g lean minced chicken
  • 1 garlic clove, crushed
  • 1 cup of brown rice
  • 1 cup chicken stock
  • ¼ cup (40 g) grated cheddar cheese
  • 1 teaspoon of turmeric powder
  • 3 teaspoons of cumin powder
  • 2 teaspoon of chilli powder
  • Salt to taste

Steps

  • Preheat the oven to 190°C.
  • Slice tops off capsicums to make lids. Scoop out seeds and membranes and discard them.

Stuffed capsicum (3)

  • Cook rice in a rice cooker using 1 cup of water and 1 cup of chicken stock.
  • Heat oil in a wok over medium heat. Add turmeric powder.
  • Add minced chicken and cooked it until it is brown

Stuffed capsicum (2)

  • Add onionand garlic. Sauté 2 minutes.
  • Add salt, chilli and cumin powder and cook for few more minutes
  • In a bowl mix the cooked chicken and rice. Add half of the shredded cheese.

Stuffed capsicum (4)

Stuffed capsicum (5)

  • Fill each capsicum with the mixture. Place upright in a shallow baking dish. Cover with capsicum lids.

Stuffed capsicum (6)

  • Cover the dish with foil and bake for 25 minutes or until the capsicums are tender.

Stuffed capsicum (9)

  • Open the lid and top the capsicum fillings with the remaining cheese. Close lids.

Stuffed capsicum (10)

  • Serve hot.

Stuffed capsicum (11)

You may also like :

*Chicken chili – Nepali Style *Chicken Tikka Masala *Goat curry

Phokso Fry (Nepali style fried lungs)

In Nepal, a goat’s brain (gidi), feet (khutta), head (tauko), stomach skin (bhundi), tongue (jibro), liver (kalejo), kidney, lungs (phokso), fried intestines (aandra), fried solidified blood (rakati) are considered delicacies and are in very high demand in Dashain and during festivals.

I know some of you might feel squeamish even thinking about eating offal but believe me if you love your meat, you will love these dishes. Another is that eating offal uses the parts of the beast that might otherwise be wasted. As it takes 10 kilos of cereal to produce one kilo of meat, then we should not be wasting any part of the carcass. Unless you deliberately avoid meat, eating offal should be regarded as “green”.

As I am from Newar community so it is very common in our household to have these delicacies.

Most of you may not know it but fried lungs are one of the tastiest of delicacies. If done the right way, Phokso fried (fried lungs) are very tasty. AS was craving it when we were in Nepal. As we were a bit scared to eat out, my MIL decided to cook one at home and at the same time teach AS and me how to do it.

In order to have a perfect Phokso fried, you must make sure you buy fresh lungs without any punctures. In Nepal, they blow air into the lungs at the butcher’s to show that it is a good one.

Phokso Fry  (1)

Once lungs are ready, it must be cleaned properly to make sure there is no blood left in the vessels. To clean it, pour water in it through its trachea multiple times until all coagulated blood remaining in the lungs come out. At the end, pour a few tablespoonful of oil into each lung.

Ingredients:

  • 1 khasi ko phokso (goat lungs)
  • 2 cups all-purpose flour
  • 2 eggs
  • 1/4 teaspoons turmeric powder
  • 1/2 teaspoons coriander and cumin powder
  • 1/4 teaspoons chilli powder
  • 1 1/2 teaspoons salt
  • 1 teaspoon garlic ginger paste
  • 4 cups water
  • kitchen strings
  • 1 small potato to use as stopper

Process:

  • Put the flour in a dish and place all ingredients over it. Mix all ingredients together until all lumps are gone. The mix should be a bit watery.

Phokso Fry  (2)

  • To make sure there are no lumps in the mixture; strain the mixture through the strainer. Use whisker if required.

Phokso Fry  (3)

  • Fill a plastic bag (we used milk bag in Nepal but you can use zip lock bag) with the mixture. Place the end of the trachea into the opening of the bag and clamp your fingers over them to seal them. Pump the mixture in the bag into the trachea.

Phokso Fry  (5)

  • When the lungs become full you will notice that the outer skin will be smooth and shiny.

Phokso Fry  (6)

  • When the lungs are full, don’t just let the trachea go as the lungs will pump the mixture out quite rapidly. Keep holding the trachea!
  • To seal the trachea, peel and cut the potato and insert the cut potato into the opening of the trachea. Shove it inside then fold and seal trachea by tying with a kitchen string. This will make sure the batter doesn’t flow out while it is being boiled.

Phokso Fry  (7)

  • In a big pot, boil water and add turmeric powder.

Phokso Fry  (8)

  • Add the lungs and cook it. You may need to turn it over to make sure all sides get cooked.
  • Once the lungs are cooked, let it cool down before cutting it.

Phokso Fry  (9)

  • Slice the lungs into pieces a few centimetres thick pieces.
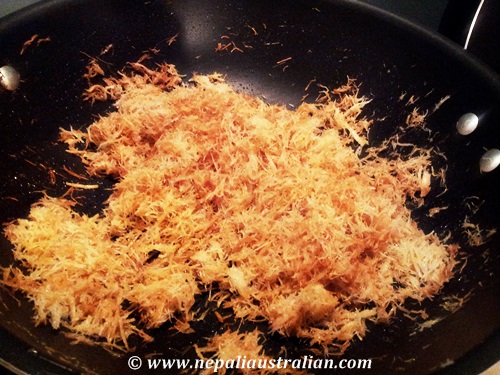
  • In a fry pan, heat oil and lay the sliced lungs in one layer.
  • Once one side is crispy and brown in colour, turn and fry the other side.

Phokso Fry  (10)

  • Take the fried lungs out on a plate.
  • Mix salt, chill power and cumin powder in the plate.

Phokso Fry  (11)

  • Sprinkle this mix on the fried lungs.

Phokso Fry  (12)

  • It is best served hot.
  • Enjoy!!!